MK2 4Motion VR6 Turbo SEMA Build
Car: 1992 VW MK2 Golf
Class: Cage could pass for SCCA and other club racing, but mainly show car
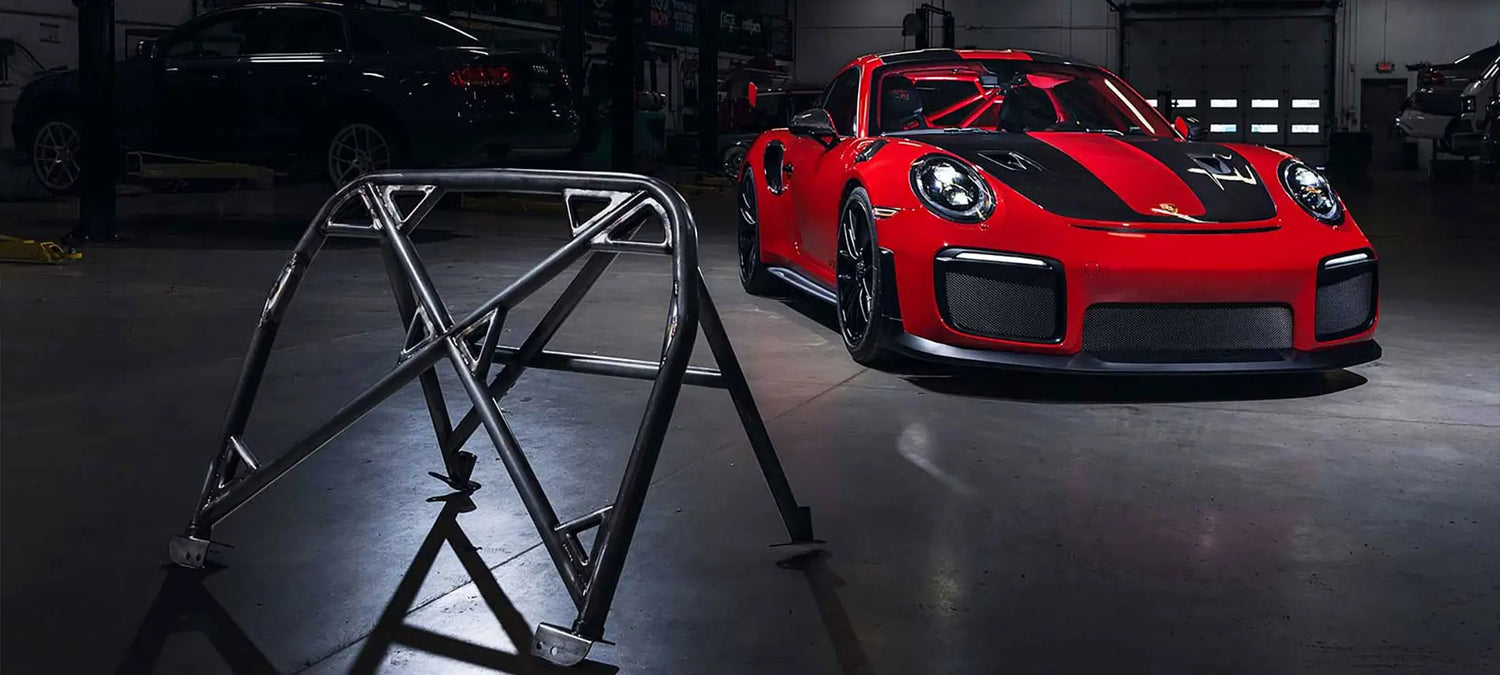
Cage: 1.5 x .095” DOM fully TIG welded
Other Goodies: 2004 R32 3.2 VR6 Turbo 4 Motion driveline with a custom rear subframe for the Haldex AWD unit, Bill Schimmel VR6 built for 1000+hp, GTX3584rs turbo, Fuel Safe cell, ECU Master and AIM PDM electronics, paint by Bobby’s Chop Shop, interior by Phenom Design and Top Stitch Upholstery
Companies Involved:

Phenom Design/Masterpiece Auto Mobile
Website: https://phenomdesigns.com/
https://masterpieceautomobile.com/
Instagram: @phenom__designs @masterpiece_automobile
Bobby's Chop Shop
Instagram: @bobbys_chop_shop
Section 1 – Rear Cradle & AWD Layout


The first step in a project like this is establishing the correct order of priorities. For an AWD-swapped Mk2 Golf, everything downstream depends on the rear driveline layout, so the Haldex unit and rear cradle became step one. Their position would dictate the design of the rear strut towers, which in turn determines roll cage landing zones, fuel cell placement, and the structure of the rear floor.
We began by fabricating a custom rear cradle using the geometry of the OEM front cradle—mirrored—allowing us to reuse factory arms, hubs, and spindles while maintaining serviceability and alignment logic. Once the cradle was built, we positioned it by centering the rear wheels in the tubs, then built a tied-in structure that mounts the cradle solidly while doubling as the foundation for the fuel cell enclosure and rear floor structure.
Section 2 – Strut Tower & Coilover Design


 With the rear cradle positioned, the next priority was establishing the strut tower and upper mount structure for the coilovers. For a custom AWD Mk2, there’s no off-the-shelf solution, so partnering with a manufacturer willing to work outside a catalog is critical.
We teamed up with Scale and built a hybrid setup using a Mk3 front coilover mated to a Mk3 knuckle with a VR6 hub, paired with a Mustang upper camber plate that Scale re-machined to work with the Mk3 strut. Their willingness to modify components made this section of the build dramatically smoother. Once we finalized the coilover geometry, the OEM strut tower was cut away, reshaped, and reinforced to fit the new top mount — giving us proper suspension travel, alignment range, and long-term serviceability.
Section 3 – Roll Cage Design & Integration


Now to the easy part—at least for us. PMF is known for our roll cage work, so this one had to live up to the reputation. We started by wrapping the freshly restored headliner, then tucked the cage high and tight to maintain headroom and a clean visual line.
The rear down bars and strut bar tie directly into the new rear towers, creating a fully load-bearing structure that links the suspension, chassis, and cage into one system. A low-profile ladder-style door bar setup was built to clear the factory interior panels without cutting, maintaining a street-car look with race-car structure. The cage is built from 1.5" x .095 DOM, fully TIG welded, and aligned with SCCA spec for material, joint prep, and load path continuity.
Section 4 – Fuel Cell Enclosure & Rear Floor Fabrication


This is the part of the build where sheet metal work really sets the tone for the finished product. Sure, you can throw in flat panels, stitch them together, bury the seams in seam sealer and call it a day — but that’s not how we built our reputation. Even the simplest panels deserve intention, detail, and a little style, because the quality our customers expect needs to run through every part of the car, seen or unseen.
With that mindset, we bead-rolled a clean reinforcement pattern and formed the fuel cell enclosure using as few pieces as possible to minimize weld seams. The result is a rigid, sealed, service-friendly rear floor area that looks factory but functions like motorsport hardware.
Section 5 – Driveshaft Fabrication & Tunnel Reinforcement


We machined the OEM end down to sleeve inside new DOM tubing, TIG-welded it, and delivered a straight, serviceable shaft to our local driveshaft shop for final balancing. Once the shaft was handled, the next task was mounting the carrier bearing. We reinforced the original exhaust tunnel, added a structural landing point, and tied it into the chassis so the driveline loads are distributed properly. A bead-rolled tunnel plate finished the section, making it look like the car was born AWD instead of converted.
Section 6 – Final Rear Structure & OEM-Style Seam Sealing


With the rear suspension, cage structure, fuel cell enclosure, and driveline all tied together, this is the point in the build where everything clicks into place visually. The additional tubing brought through the back wall to support and protect the fuel cell finished the structure exactly the way we envisioned — strong, purposeful, clean. It’s almost a shame this stage gets covered up, because the raw metal phase is where the craftsmanship is fully exposed.
One detail that separates a proper chassis build from a patchwork job is how the seams are handled. We use the same OEM-grade urethane seam sealers and application methods used in modern collision centers, and every metal-to-metal surface is prepped with weld-through coating before welding. That means no moisture traps, no rust streaks, and a sealed interior that will last as long as the chassis itself.
Section 7 – Engine Bay Mockup & Custom Volkswagen Firewall Panel


Section 8 – Hot/Cold Side Fabrication, Intake Box, and Cooling System Upgrades


With the custom firewall finalized, it was time to move into one of the most involved stages of the build: fabricating the hot and cold side, building the intake system, and sorting the cooling layout. A Garrett intercooler core was selected to support the airflow demands of the GTX3584RS turbo, and once that was mounted, all the intercooler piping was fabricated in-house to maintain tight packaging and clean visual symmetry through the bay.
Nick wanted the intake system to be more than just functional — he wanted a centerpiece. So the sheet-metal intake box was built around the filter itself, allowing a clear window in the lid to showcase the large velocity stack at the end of the charge pipe. It’s the kind of detail that doesn’t add horsepower, but makes the car feel engineered instead of assembled.
Cooling system details often get overlooked in swaps like this, but not here. We weren’t happy with any of the off-the-shelf plastic water manifolds for the VR6, so a billet weld flange was machined to allow us to build our own solution from scratch. That opened the door to integrate a full swirl pot — something we use in many of our high-performance builds — while still retaining OEM recirculation and thermostat functionality. The end result is a cooling system that works as well as it looks, with motorsport reliability built into a street chassis.
Follow the rest of the build on our YouTube!
https://www.youtube.com/watch?v=AejvWt5VD0k&list=PLQtK3lxXgcxaKuzpGKM0a2EaiZBJpzwKe